


Mold spores are undetectable and travel quickly through the air to find perfect environments for growth. Essentially, mold loves moisture and organic materials. This makes your drywall a prime target should it become damp.
Your drywall can retain or absorb moisture easily and it’s made up of organic materials which serve as a food source for mold. Which means your drywall is overqualified for mold growth.
If you’re here, you know the terrible effects of mold in homes. Finding mold on drywall can be alarming, but addressing it promptly can prevent further damage and health issues. But don’t panic, because most drywall mold situations within 10 square feet can be handled by you.
We'll show you how to remove mold from drywall safely and effectively, and most importantly, how to stop it from coming back. First, let’s verify if we have a drywall mold problem.
Signs that you have mold on drywall
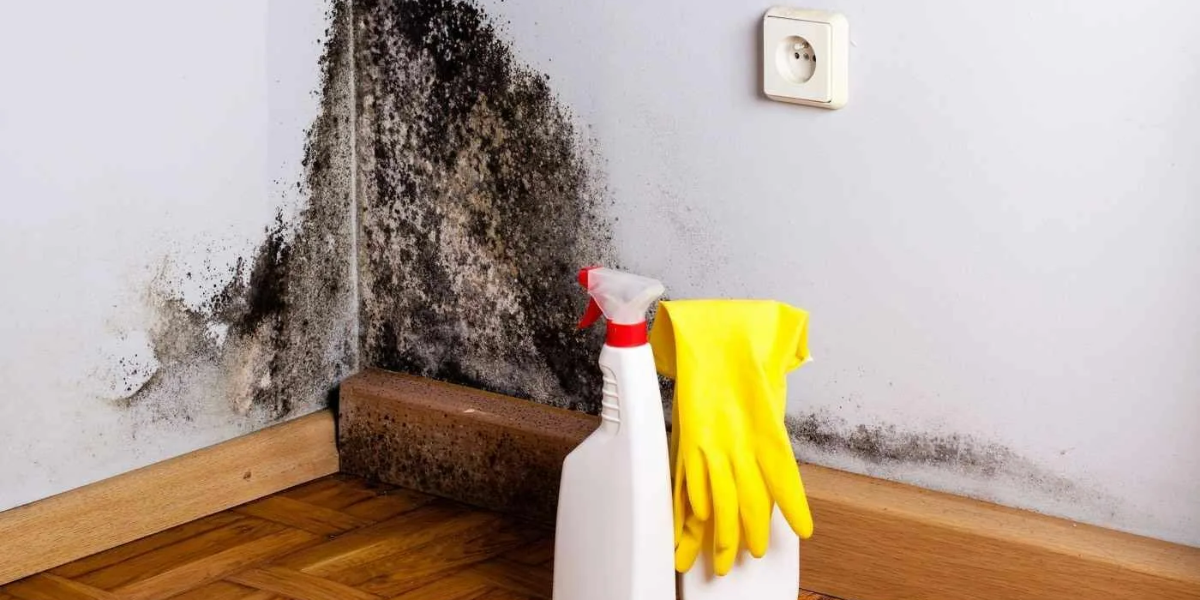
Mold often appears as discolored patches (black, gray, green, white, or brown) and may have a musty smell. If your drywall is damp, soft, or sagging, it's likely mold has taken hold. But if that’s not enough, here are other signs to look out for:
- Color Changes or discoloration of surface
- Bubbling or Peeling Paint
- Warped or Bulging Walls
- Musty Odor
- Health Issues like Allergic Reactions, Respiratory Problems, Headaches and Fatigue
- Damp or Wet Spots
- Condensation
- Damage to Wallpaper or Wall Coverings
How to Remove Mold from Drywall
Step 1: Safety
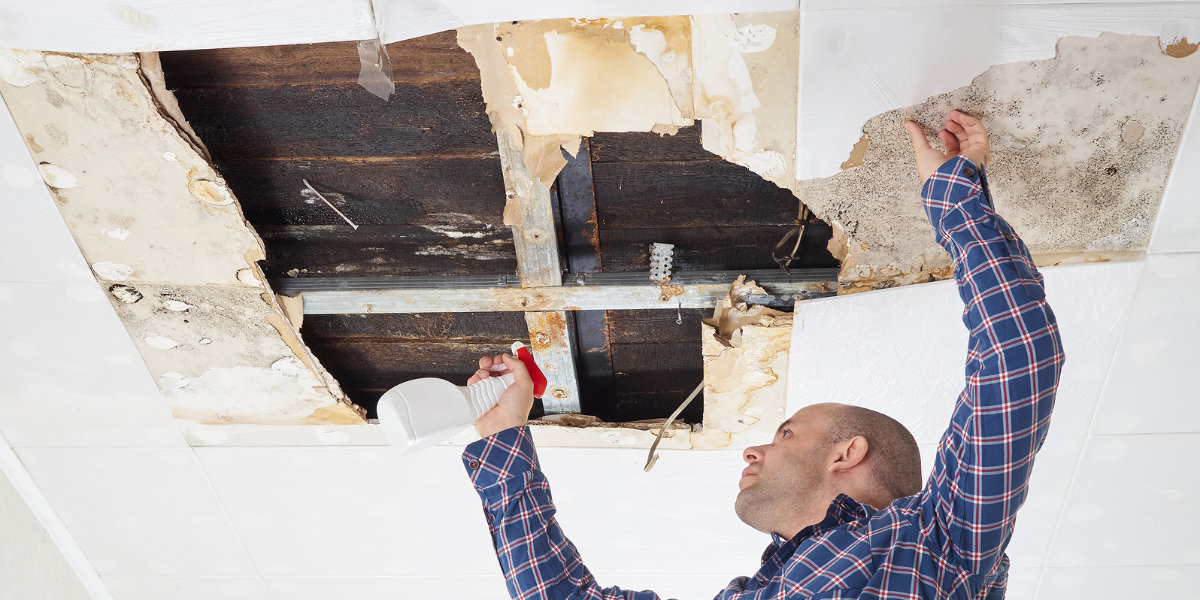
Mold removal from drywall requires careful preparation to protect yourself and prevent the mold from spreading. Here’s a brief overview of the procedures and tools you’ll need:
Protect your lungs: Mold spores can irritate your respiratory system. Wear an N95 respirator mask or a mask with a HEPA filter to prevent inhaling spores. To help remove spores while cleaning, consider using a HEPA air scrubber like the Abestorm HEPA Air Scrubber.
Protect your skin and eyes: Wear gloves that extend to the middle of your forearms and goggles without ventilation holes to shield your skin and eyes. Consider a disposable protective suit for full-body coverage.

Contain the area: Seal off the room from the rest of your home and turn off the HVAC system to prevent spores from circulating.
Ventilate: Treating mold on drywall involves using a combination of cleaning agents and ensuring the area is well-ventilated. Open windows for fresh air after you've finished cleaning and the area is dry.
To learn how to remove mold from drywall, start by gathering the necessary cleaning supplies, tools and materials:
Cleaning supplies
- Spray bottle
- Scrub brush, toothbrush, or sponge
- Paper towels
Containment and protection
When treating mold on drywall, it's important to wear protective gear to avoid inhaling mold spores.
- Plastic sheeting or drop cloths
- Painter's tape
- N95 respirator mask
- Gloves
- Goggles
Optional: Disposable protective suit
Mold removal and repair tools
1. HEPA filter vacuum
3. Utility knife
4. Screwdriver
5. Fan
6. Pencil
7. Tape measure
8. Stud finder
9. Drywall saw (if needed for large areas)
10. Sanding block
11. Putty knife
Replacement materials (if needed)
- Drywall
- Drywall screws
- Primer
- Mold-resistant paint
- Drywall compound
- Insulation (if removing wall insulation)
Important Note: If you have allergies, asthma, or a compromised immune system, consult with your doctor before attempting mold removal. For extensive mold growth or if you're unsure about the process, it's always best to consult a professional mold remediation specialist.
Step 2: Stop the Moisture Source
The first step in mold removal from drywall is to identify the extent of the infestation and the underlying moisture source. This step is important to prevent the mold from growing back after removal. Identify the source of the moisture problem and fix it. It could be leaky pipes or windows, roof leaks, condensation, etc. Once you have identified the problem and fixed it you can now proceed with the next step.
Step 3: Clean the Surface
This step involves a three-step process: removing the surface mold, killing the mold, and drying the surface. As mentioned above, if the affected area is small (less than 10 square feet) and the drywall isn't damaged, you can try cleaning it yourself.
However, proper mold removal from drywall may involve cutting out and replacing affected sections if the mold has penetrated deeply.
You’ll start by vacuuming the moldy area with a HEPA filter vacuum to remove loose spores.
When the surface spores have been removed, you can start killing the mold. The cleaning options available include a commercial mold remover, hydrogen peroxide, and a cleaning mixture of vinegar, water, and baking soda.
For a commercial mold remover, consortium is the most recommended. But what it really does is lock down spores and inhibit or prevent mold growth. To get the most out of this, the best approach is to use an additional product or other cleaning solutions to clean the surface and then apply consortium to stop further progress.
Choose your solution and mix it appropriately. For hydrogen peroxide, Pour the 3% hydrogen peroxide into a spray bottle without diluting it. For water, vinegar, and baking soda, mix them in a ratio of 1:1:2. Apply the solution and let it sit for 10 minutes before brushing.
Then scrub the area gently with a brush or sponge, then wipe it clean with a damp cloth.
After that, you can set up a fan to ensure the wall dries completely
NOTE: According to the EPA, it’s not advisable to use bleach to clean mold.
Step 4: Remove and Replace Damaged Drywall
If the mold has penetrated the back of the drywall or the surface is severely damaged, it's time to replace the affected section. Here's how:
1. Safety First: Turn off the power and water supply to the area you'll be working in. This will prevent electrocution and further water damage.
2. Locate the Studs: Use a stud finder to locate the wooden studs behind the drywall. These studs are the structural support for the wall and where you'll attach the new drywall. Mark their location with a pencil.
3. Cut Out the Moldy Drywall:
Score: Use a utility knife to score a rectangle around the moldy area, extending about 6 inches beyond the visible mold on all sides.
Saw: Carefully cut along the scored lines with a drywall saw. Be gentle to avoid damaging electrical wires or plumbing that may be behind the wall.
4. Inspect and Treat Framing: Carefully remove the damaged drywall section. Check the exposed wood framing for mold. If you find any, scrub it with a mold-killing solution and allow it to dry thoroughly. Apply a mold-resistant primer to the wood to prevent future growth.
5. Install New Drywall: Measure and cut a new piece of drywall to fit the hole.
Secure it to the studs with drywall screws.
Use drywall tape and joint compound (mud) to cover the seams and screw holes.
Let the compound dry completely, then sand it smooth.
6. Prime and Paint: Prime the repaired area with a stain-blocking primer to cover any discoloration.
Paint the repaired area to match the rest of the wall. After treating mold on drywall, consider using mold-resistant paint for added protection in damp areas.
Important Note: If you encounter extensive mold growth in your walls, it's strongly recommended to consult a professional mold remediation specialist. They have the expertise and equipment to safely and effectively address the issue.
Step 5: Prevent Spores settlement
Mold spores are everywhere but grow when there’s moisture and organic materials. That’s their source of food and your home gives lots of chances for mold to grow. Even after cleaning them, these tiny mold spores will still find a hideout.
Your home can’t be 100% dry so there’s no guarantee that mold isn’t growing in a dark corner let alone your drywall. There’s also no way to detect these spores while flying in the air, they cause allergies and are actively searching for where to start a mold infestation again.
By constantly filtering the air, air scrubbers prevent mold spores from settling on sheetrock walls. This thereby reduces the risk of mold colonization. If they aren’t able to fly around and settle then your drywall is safe which means your home and your health are safe too.
You can use Abestorm Filteair HEPA 550 Air Scrubber while cleaning and they can prevent the spores from settling. When it comes to mold, prevention is always the best action, even the EPA confirms this.
Go here now to save 20% off Abestorm Filteair HEPA 550 Air Scrubber and win a free item with your purchase.
More ways to prevent mold on sheetrock walls
Control Humidity: Mold thrives in humid conditions. Use a dehumidifier to maintain indoor humidity levels between 30% and 50%. This is especially important in bathrooms, basements, and other areas prone to dampness.
Increase Ventilation: Proper airflow is key to preventing moisture buildup. Run exhaust fans in bathrooms and kitchens while showering or cooking. Open windows whenever possible to allow fresh air to circulate, especially in warmer months.
Clean Up Spills Promptly: Don't let water sit on surfaces for extended periods. Wipe up spills immediately and dry the area thoroughly. This includes leaks from pipes, windows, or roofs.
Use Mold-Resistant Products: Consider using mold-resistant paint, primers, and drywall in areas prone to moisture, such as bathrooms and laundry rooms. These products contain additives that inhibit mold growth.
Maintain Your Home: Regularly inspect your home for signs of leaks, water damage, or condensation. Fix any issues promptly to prevent moisture buildup.
Extra Tips:
Don't Overwater Houseplants: Excess water can lead to mold growth in the soil and on nearby surfaces.
Regularly Clean Gutters: Clogged gutters can cause water to overflow and seep into your walls.
Keep Your Air Conditioner Well-Maintained: A dirty air conditioner can contribute to excess humidity.
Make prevention a habit, and you can create a drier, healthier indoor environment and significantly reduce the chances of mold taking hold on your sheetrock walls.

Shop For Dehumidifier